How to Crop Photos Well: Composition, Aspect Ratios and Straightening
Cropping is the simplest edit there is, and one of the most effective: the same photo can feel cluttered or deliberate depending on where the edges fall. This guide covers the composition choices behind a good crop, how to pick an aspect ratio, how much resolution a crop costs, and how to level a crooked horizon first.
What a crop actually does
A crop keeps a rectangle of the original pixels and discards everything outside it. It does not resample, blur or sharpen the part you keep: each remaining pixel is exactly the pixel that was there before. Two things change: the framing (what the viewer sees and where it sits in the frame) and the pixel count (the image is now smaller).
You are trading resolution for a better composition, so make the trade buy something: a stronger subject, a cleaner background, or a shape that fits the destination.
Composition: where to put the edges
The rule of thirds
Imagine two vertical and two horizontal lines dividing the frame into a 3×3 grid. Placing the subject on one of those lines, or where two of them cross, usually looks more dynamic than dead center. A horizon on the lower third line emphasizes the sky; on the upper third, the land or water. It is a starting point rather than a law: symmetrical scenes, such as reflections or architecture shot straight on, often look best centered.
Photoyam’s crop box does not draw a thirds grid, but you can add one with guides. Choose View › New Guide…, pick an orientation, and enter a position in pixels. On a 1600×1040 image, vertical guides at 533 and 1067 and horizontal guides at 347 and 693 mark the thirds.
Headroom and lead room
Headroom is the space between the top of a person’s head and the top of the frame. Too much makes the subject look small and sunk; none at all feels cramped. In a tight headshot it is fine, even common, to crop through the top of the hair, as long as the eyes sit roughly on the upper third line.
Lead room (or looking room) is space in front of a subject that is moving or facing sideways. A cyclist heading right needs more space on the right than the left; crop it the other way and the subject seems about to leave the picture.
Where not to cut
Avoid placing an edge exactly at a joint (wrist, knee, ankle, neck), which makes limbs look amputated. Cut mid-thigh or mid-forearm instead. Also check the edges for small distractions, such as a bright patch, half a sign or a stray elbow. A slightly tighter crop usually fixes them.
Choosing an aspect ratio
The aspect ratio is the shape of the crop, written as width to height. Decide it from where the image is going, before you start dragging.
| Ratio | Typical use | In the Crop tool |
|---|---|---|
| 1:1 | Profile pictures, square posts, product grids | Preset |
| 3:2 | The native shape of most DSLR and mirrorless cameras; 4×6 in and 8×12 in prints | Preset |
| 4:3 | The native shape of most phone cameras; slides | Preset |
| 16:9 | Video frames, YouTube thumbnails, desktop wallpapers, website banners | Preset |
| 4:5 | Tall social feed posts; 8×10 in prints | Use Canvas Size (see below) |
| 9:16 | Stories, Reels, phone wallpapers | Use Canvas Size (see below) |
| Free | Anything where the shape is up to you | Preset (the default) |
The Crop tool’s presets are landscape shapes: 4:3 gives a box wider than it is tall. For portrait ratios, Image › Canvas Size… is the precise route. Enter the exact width and height you want, choose an Anchor to decide which part is kept (the center square trims evenly from both sides), and click OK. A canvas smaller than the image crops it. For example, a 4:5 crop from a 4000×3000 photo is 2400×3000.
Cropping without running out of pixels
Pixel count falls with the area you keep. Keeping the middle half of a 4000×3000 photo in each direction leaves 2000×1500: a quarter of the pixels, 3 megapixels out of 12. That is still plenty for a 1080-pixel social post or a web page, but for a print viewed up close (about 300 pixels per inch is the usual target), 2000 pixels covers only about 6.7 inches.
So before you commit a tight crop, ask how big the result will be shown. If the crop ends up smaller than the display size, the image will be enlarged and look soft. Photoyam shows the current document size in the status bar at the bottom of the window, so check it right after cropping.
Straighten before you crop
A horizon tilted by even one or two degrees is noticeable, and sea horizons and building edges make it obvious. Straightening rotates the whole picture, which always exposes empty triangles at the corners, so you then crop inward to remove them. That is why straightening comes first.
The cost grows with the angle. For a 3:2 landscape photo, keeping the original shape, a 1° correction trims roughly 2.5% off each dimension and a 3° correction roughly 7%. Past about 5°, ask whether the tilt was intentional.
Photoyam gives you three ways to do it:
- The Crop tool’s Straighten button. Click Straighten in the options bar, then drag a line along something that should be level, such as the horizon or a windowsill. When you release, the image rotates so that line is horizontal. The canvas keeps its size, so the corners of the photo are clipped and the exposed corners show as transparent.
- The Ruler tool. Drag along the horizon to read its angle (A) in the options bar, then click Straighten. It works the same way as above, and is handy when you want to see the angle before committing.
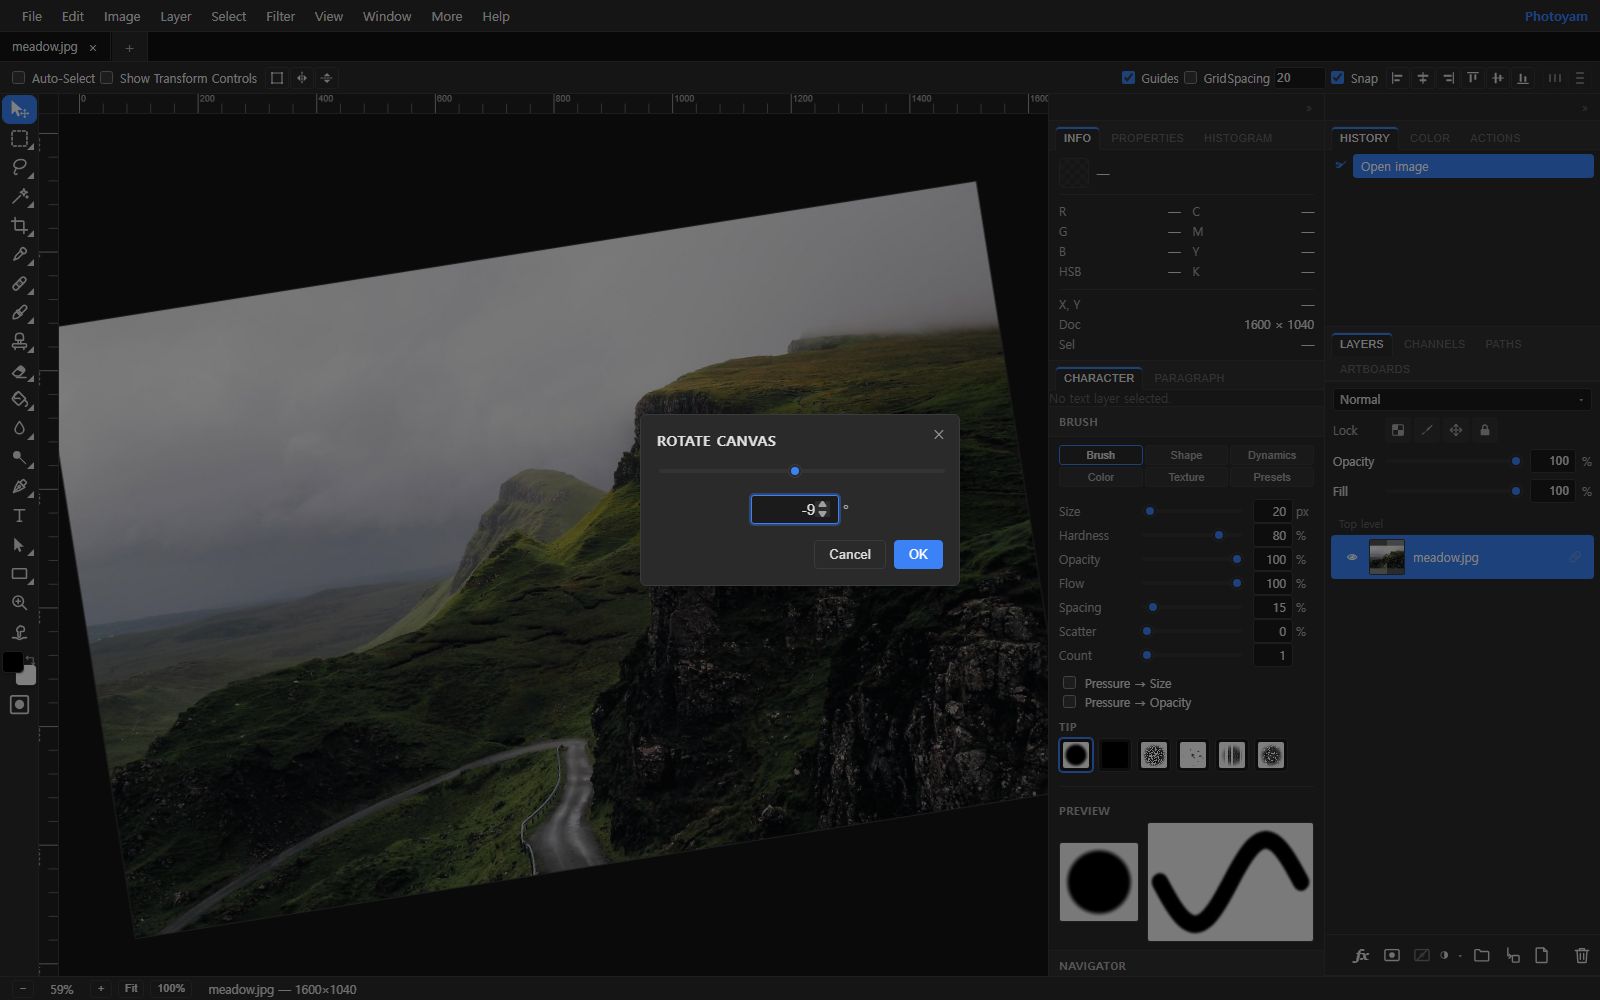
- Image › Image Rotation › Arbitrary… Enter an angle (positive turns clockwise, negative counterclockwise) with a live preview. Here the canvas grows to fit the rotated photo, so nothing is clipped.
One caution with the drag-a-line methods: they always make the line horizontal. Drag along a vertical edge, like a doorframe, and the picture turns almost 90°. If that happens, undo and use the Arbitrary dialog instead.
Step by step: crop a photo in Photoyam
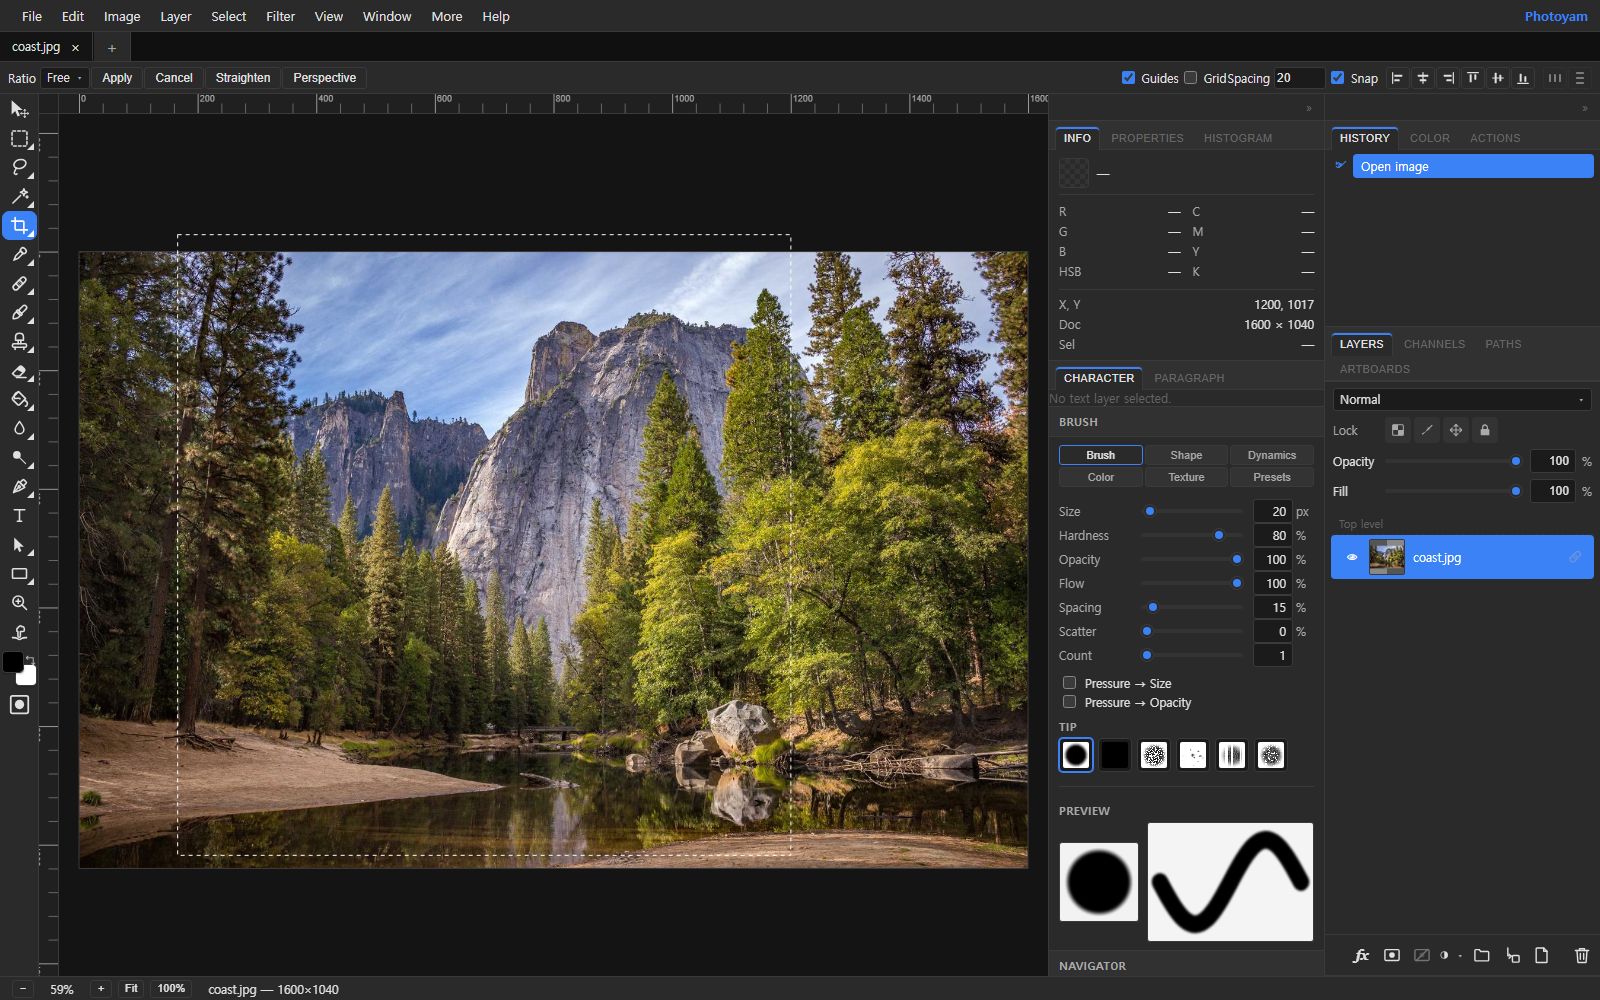
- Open the photo. Go to the Crop tool page and choose or drop an image. It opens in the editor with the Crop tool already selected. If you are already in the editor, pick the Crop tool from the toolbar on the left.
- Straighten if needed. Click Straighten and drag along the horizon. Skip this if the photo is already level.
- Choose a ratio. In the options bar, set Ratio to Free, 1:1, 4:3, 3:2 or 16:9.
- Drag the crop box. Drag from one corner of the area you want to keep to the opposite corner. With a ratio set, the height follows the width automatically. To try a different framing, simply drag again; the new box replaces the old one. After straightening, keep the box inside the photo so no transparent corner is included.
- Apply. Click Apply or press Enter. Press Escape or click Cancel to clear the box without cropping.
- Check and export. Look at the new size in the status bar, then use File › Export As to save a PNG, JPG or WebP copy.
The options bar also has a Perspective mode for a different job: squaring up something photographed at an angle, such as a document, a painting or a sign. Turn it on, drag the four corner handles onto the corners of the object, and click Apply Perspective. The result is a flat, rectangular image of just that object.
Common mistakes
- Cropping before straightening. The rotation then exposes corners inside your carefully chosen frame, and you have to crop a second time, losing more.
- Cropping too tight for the destination. A crop that looks great on a phone can be too small for a print or a full-width banner. Check the pixel size against where the image will be shown.
- Centering everything by habit. Try the subject on a third line and compare. Keep the centered version only if it is clearly stronger.
- Leaving a subject no room to move or look into. Give space in the direction of motion or gaze.
- Choosing the ratio last. If the image must be 16:9 or square, set that first; otherwise a crop you like may not survive the forced reshape later.
Try it in Photoyam
Crop to a free shape or a fixed ratio, straighten a tilted horizon, and export the result. Free, no sign-up, and your photo stays on your device.
FAQ
Does cropping reduce image quality?
The pixels you keep are unchanged, so the cropped area is exactly as sharp as before. What drops is the pixel count. That only becomes visible if you then display or print the crop larger than its new resolution supports.
How do I crop to a portrait ratio like 4:5 or 9:16?
The Crop tool presets (1:1, 4:3, 3:2 and 16:9) are landscape shapes. For a portrait ratio, use Image, Canvas Size with the exact width and height you want and an anchor that keeps the important part, or crop free-form first and then trim to the exact ratio with Canvas Size.
Can I adjust the crop box after drawing it?
Drag again to draw a new box; the previous one is replaced. Press Escape or click Cancel to clear it, and Enter or Apply to commit. If you commit a crop you don't like, Undo brings the full image back.
Why are there empty corners after I straighten?
Rotating a rectangle inside a rectangle always exposes triangles at the corners. Crop inward afterward until the empty areas are gone. The bigger the tilt, the more you have to trim.