How to Remove the Background from a Photo (Free, No Upload)
Cutting a subject out of its background used to mean tracing it by hand with a pen tool. Today a small AI model can do most of the work in a few seconds, right in your browser. This guide explains what that model is actually doing, walks through a cut-out step by step, and shows how to fix the edges it gets wrong.
When removing a background is worth it
A cut-out is useful any time the subject matters and the surroundings do not. The most common reasons are:
- Product photos. Marketplaces and online shops often ask for a plain white or light background so listings look consistent. Removing a cluttered kitchen counter behind a mug is faster than reshooting it.
- Profile pictures and headshots. A clean, neutral backdrop (or a brand color) makes a casual phone photo usable on a résumé, a team page or a conference badge.
- Stickers and graphics. Messaging stickers, slide decks and thumbnails need the subject on transparency so it can sit on top of anything.
- Compositing. Placing a person or object into a different scene starts with isolating it cleanly, then matching light and color in an editor.
If you only need to hide a distracting background rather than remove it, a blur is often the better choice: it keeps the photo looking natural and avoids edge problems entirely.
How automatic background removal works
The tool does not “know” what a background is. It runs a segmentation model: a neural network trained on many photos where people had carefully marked which pixels belong to the subject. From that training it learned to estimate, for every pixel in a new photo, how much of that pixel is subject and how much is background.
The output is called a matte, or alpha mask: a grayscale image the same size as your photo. White means “keep this pixel,” black means “make it transparent,” and the grays in between mean partly transparent. Those in-between values are what make hair and soft edges look natural instead of cut out with scissors. The tool then copies the matte into the photo’s transparency channel, and the background disappears.
In Photoyam, this model runs on your device, inside the browser tab. The first time you use it, the browser downloads the model file and caches it. After that, the only thing doing work is your own computer or phone. Your photo is never sent to a server, which matters if it is a client’s product shot, an ID photo or anything personal.
Step by step: remove a background in Photoyam
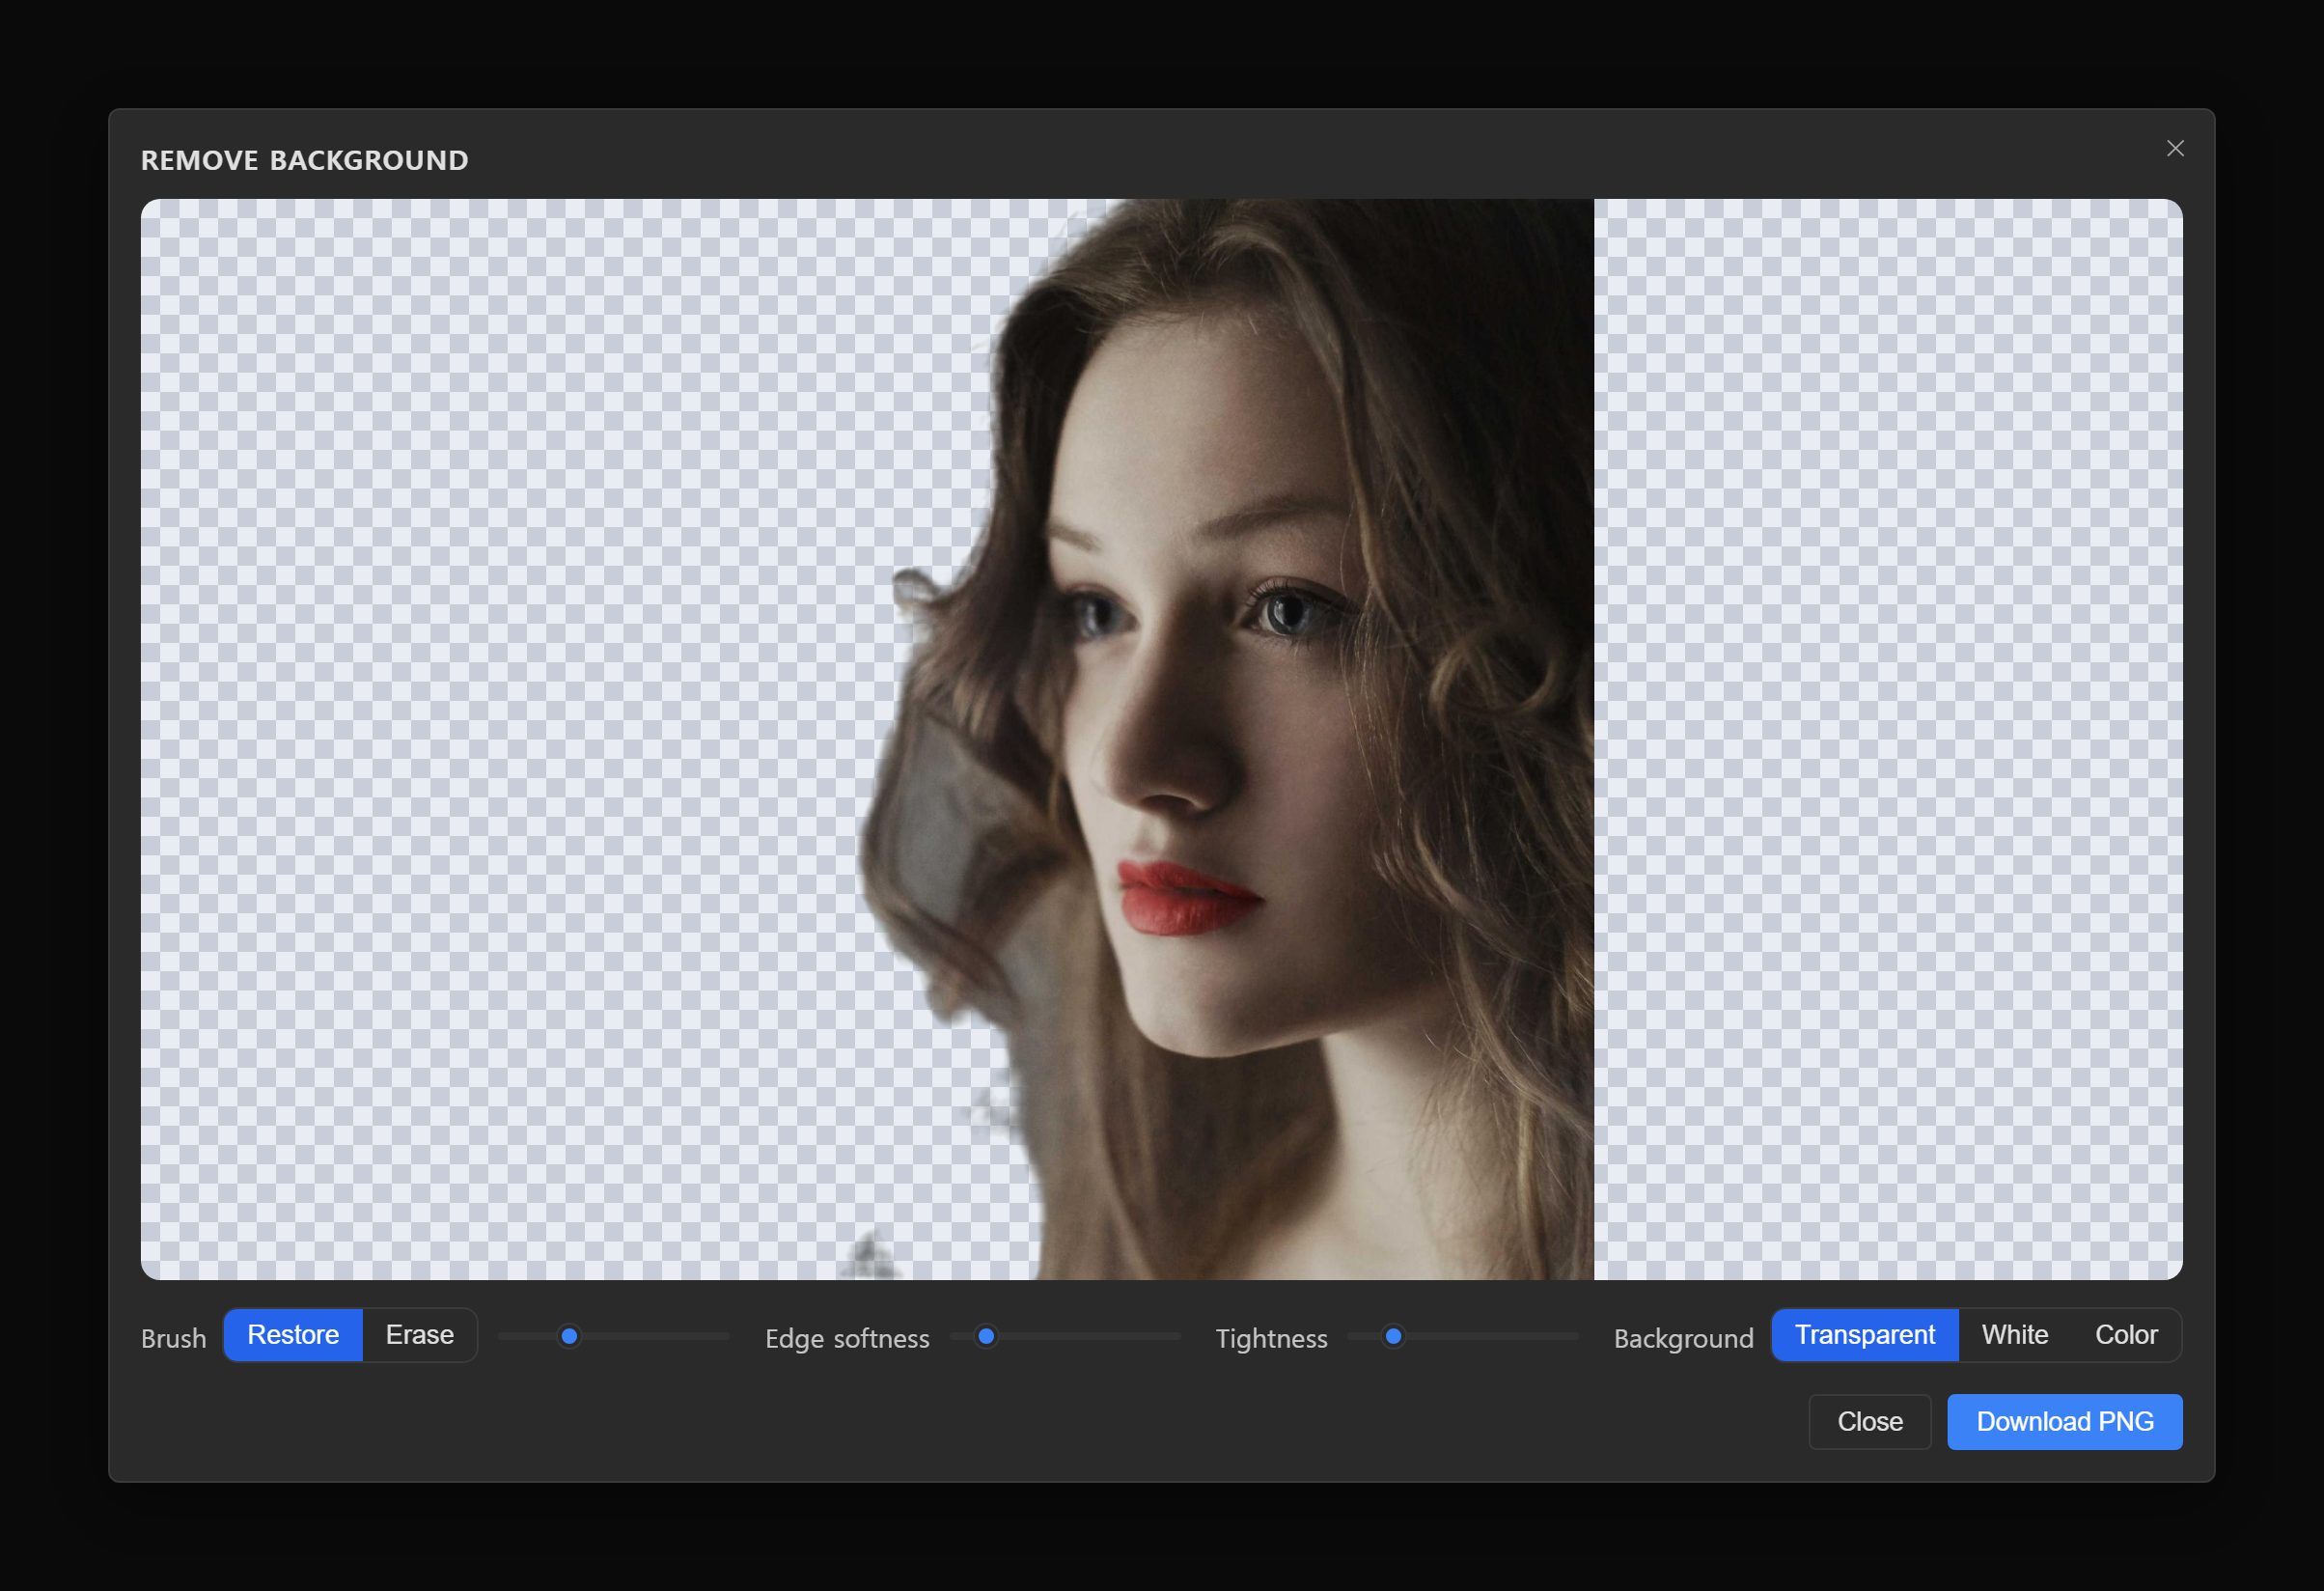
- Open the tool and add your photo. Go to the Remove Background tool and click Choose an image, or drag the file onto the page. The photo opens in the Remove Background window. Nothing has been processed or sent anywhere yet.
- Run the automatic cut-out. Click Remove background. A progress percentage appears; on the very first run this includes the one-time model download, so give it a moment on a slow connection. When it finishes, the background is replaced by a checkerboard, the usual way editors show transparency.
- Fix mistakes with the brush. Choose Restore to paint back parts of the subject the model removed (an ear, a strap, the tip of a bottle), or Erase to paint away leftover background (a gap between an arm and the body is the classic one). Use the slider next to the buttons to set the brush size. Restore brings back the original pixels, so an over-eager erase is never permanent.
- Adjust Edge softness. This slider blurs the edge of the matte by up to a few pixels. A little softness (the default is 1) hides jagged steps; more makes the subject look slightly out of focus around the outline, so raise it only as far as needed.
- Adjust Tightness. Tightness pulls the edge inward by turning faint, mostly-background pixels fully transparent. Raise it if you see a halo of the old background around the subject; lower it if fine hair or fur starts to disappear.
- Pick a background. Leave Transparent for stickers, logos and compositing. Choose White for marketplace listings, or Color to fill with any color from the picker.
- Download.
Click Download PNG. The file is saved with
-no-bgadded to the original name, so it will not overwrite your photo.
Getting cleaner edges
On most photos the automatic pass gets the shape right, and what is left to fix sits at the edge. Each kind of edge has its own fix.
Hair and fur
Loose strands are partly transparent in real life, and the matte captures that with gray values. Keep Tightness low so those strands survive, and resist painting over them with Erase. If a few stray hairs pick up the old background color, placing the cut-out on a background with similar brightness hides it far better than trimming the hair away.
Glass, veils and smoke
A wine glass is transparent, so the “correct” matte is gray across the whole bowl, and the background shows through it. Automatic tools usually make it either solid or invisible. For product shots, restore the glass fully and accept a slightly solid look, or shoot it against a plain white backdrop in the first place.
Low contrast between subject and background
A white shirt against a white wall, or a black cat on a dark sofa, gives the model very little to go on. Expect to fix these edges by hand: zoom in with your browser, set a small brush and work along the outline in short strokes. If you are still taking the photo, a background that contrasts with the subject saves more time than any edge trick.
Shadows
The model treats a cast shadow as background and removes it, which can make a product look like it is floating. For a natural result, add a soft shadow back in the editor underneath the object on its own layer, rather than trying to keep the original one.
Hard cases: finish the job in the full editor
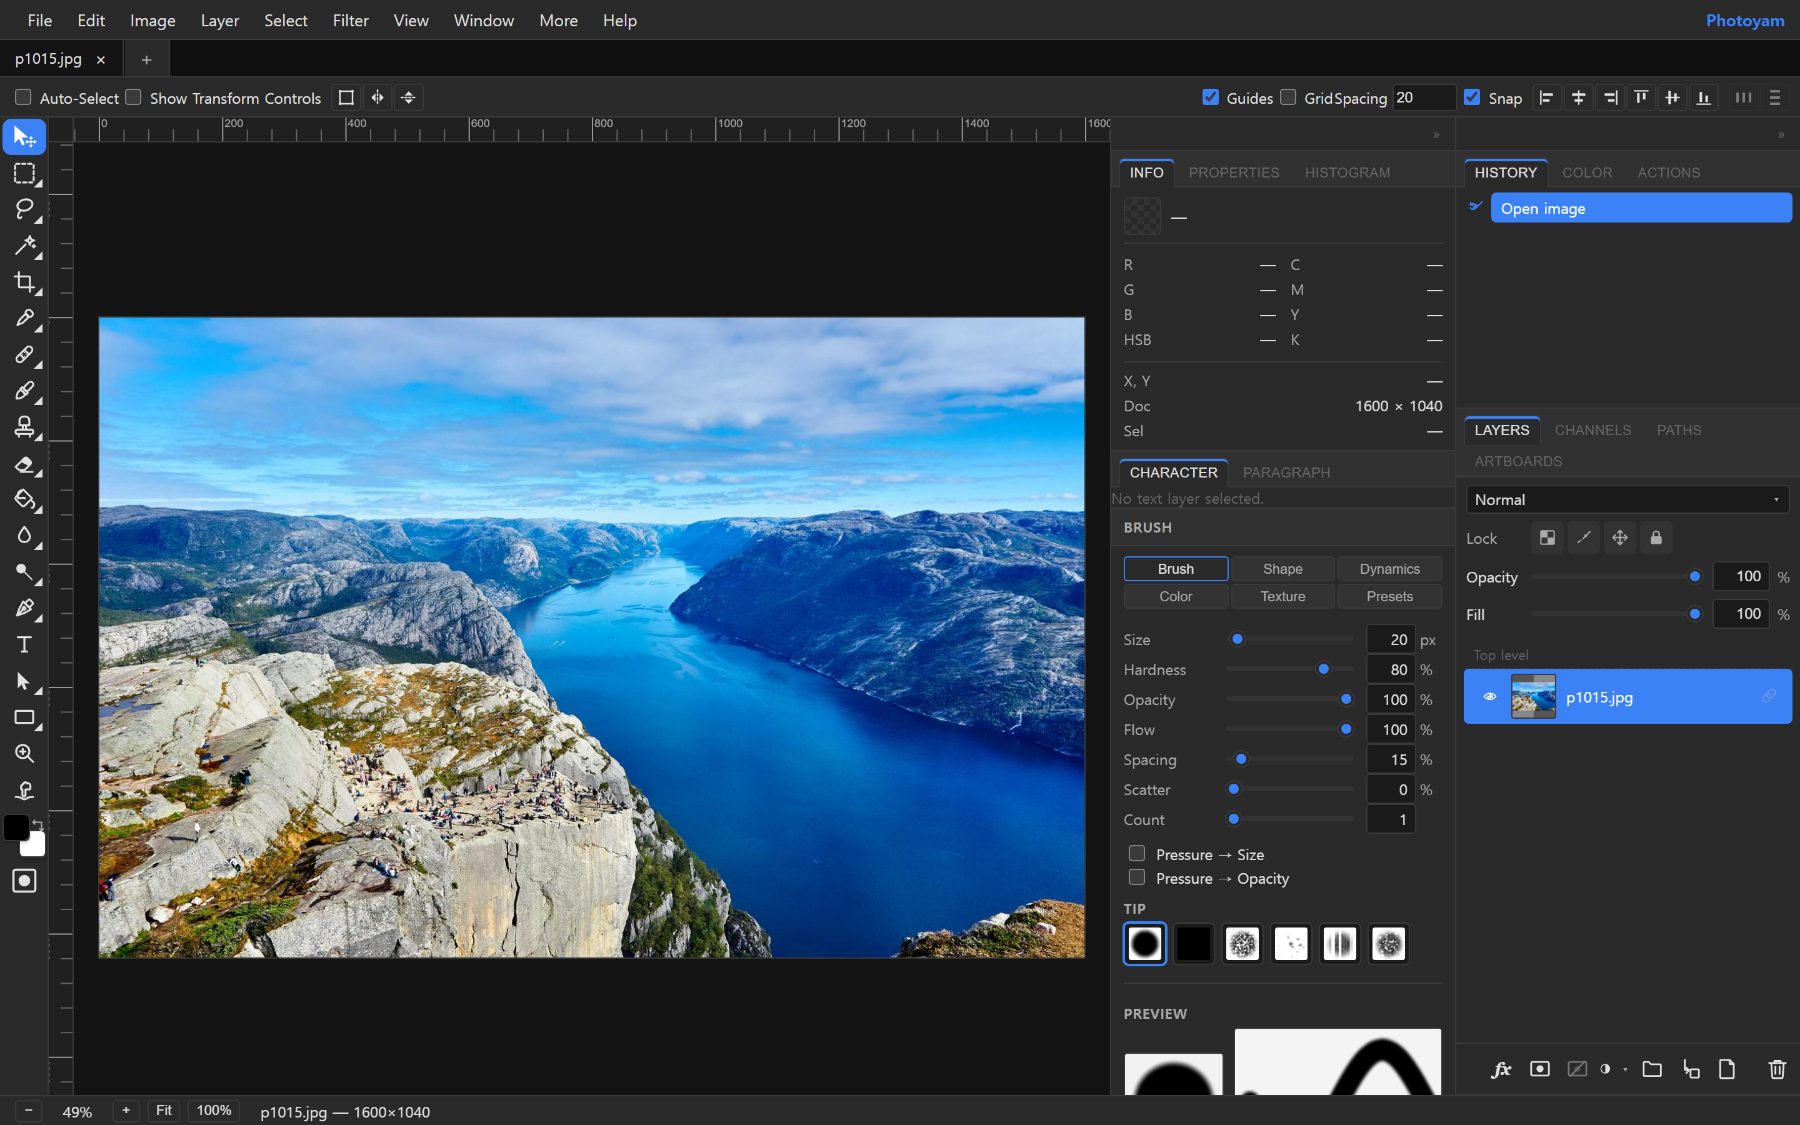
The quick tool works on images up to 1,600 pixels on the longest side and has one brush. When you need full resolution or more precise control, open the photo in the Photoyam editor and build the cut-out with a selection and a layer mask, the same way you would in Photoshop:
- Select the subject with the Quick Selection or Magic Wand tool, or with Select › Color Range… if the background is one solid color.
- Open Select › Refine Edge… and turn on Smart Radius and increase Radius around hair so the edge adapts to detail. Use Expand/Contract to nudge the whole edge in or out, and switch the view to On Black or On White to spot halos.
- Set Output To to Layer Mask. The background is hidden, not deleted.
- Paint on the mask with the Brush: black hides, white reveals. The mask’s Feather and Density settings in the Properties panel soften or weaken it globally.
Because a mask is non-destructive, you can keep refining it later. When you are done, use File › Export As › PNG to save the transparent result.
Which file format to save in
Transparency only survives if the file format supports it. This is the single most common reason a “transparent” cut-out shows up with a white or black box.
| Format | Transparency | Best for |
|---|---|---|
| PNG | Yes, full soft edges | Stickers, logos, design files, anything you will edit again. Lossless, so files are larger. |
| WebP | Yes, full soft edges | Websites and online stores: usually much smaller than PNG at similar quality. |
| JPG | No | Final images on a solid background, such as a white product shot. Transparent areas are filled with a solid color. |
A practical rule: keep a PNG as your master copy, then convert it to WebP for the web, or to JPG only after you have chosen a solid background.
Common mistakes
- Saving as JPG and expecting transparency. JPG cannot store it; the background comes back as a solid color.
- Cranking Tightness to kill a halo. It also eats hair and thin details. Use a small increase, then fix the remaining spots with Erase.
- Starting from a tiny image. A cut-out from a 400-pixel thumbnail will look soft when enlarged. Start from the largest original you have.
- Ignoring the new background. A subject lit by warm indoor light looks pasted on over a cool blue sky. Match the light, or choose a neutral backdrop.
- Judging the edge only on the checkerboard. Check it against both a light and a dark background before you publish; each reveals different flaws.
Try it in Photoyam
Remove a background in your browser, refine the edge, and download a transparent PNG. Free, no sign-up, and your photo never leaves your device.
FAQ
Is my photo uploaded when I remove the background?
No. The cut-out model runs inside your browser tab. The only download is the model itself, fetched once on first use and then cached. Your image stays on your device.
Why does my cut-out have a thin light or dark outline?
That fringe is leftover background color in semi-transparent edge pixels. Raise Tightness a little to trim it, or place the subject on a background closer to the original one. For hair, a small amount of fringe usually looks more natural than a hard trim.
What resolution is the result?
The quick Remove Background tool works at up to 1,600 pixels on the longest side, which suits web pages, social posts and marketplace listings. If you need the full original resolution, build the cut-out in the editor with a selection and a layer mask instead.
Can I get a white background instead of a transparent one?
Yes. Set Background to White, or to Color and pick any color, before you click Download PNG. The downloaded file will have that solid background baked in.